Today let's talk about the topic of airtightness testing. This seems to be a simple process, in fact, hidden mystery, let us together to unveil its mystery.
First, let's start with the most basic question:What is airtightness testing?In a nutshell.Check a closed vessel or system for gas leaks.Think of it like giving a balloon a medical checkup to make sure it doesn't 'deflate' at a critical moment.
I. Positive and negative pressure methods
In industry, we use two main methods: the positive pressure method and the negative pressure method.The positive pressure method is like inflating a balloon, where we fill the product under test with compressed air at a pressure higher than atmospheric pressure.If there's a leak, the air goes out the door.
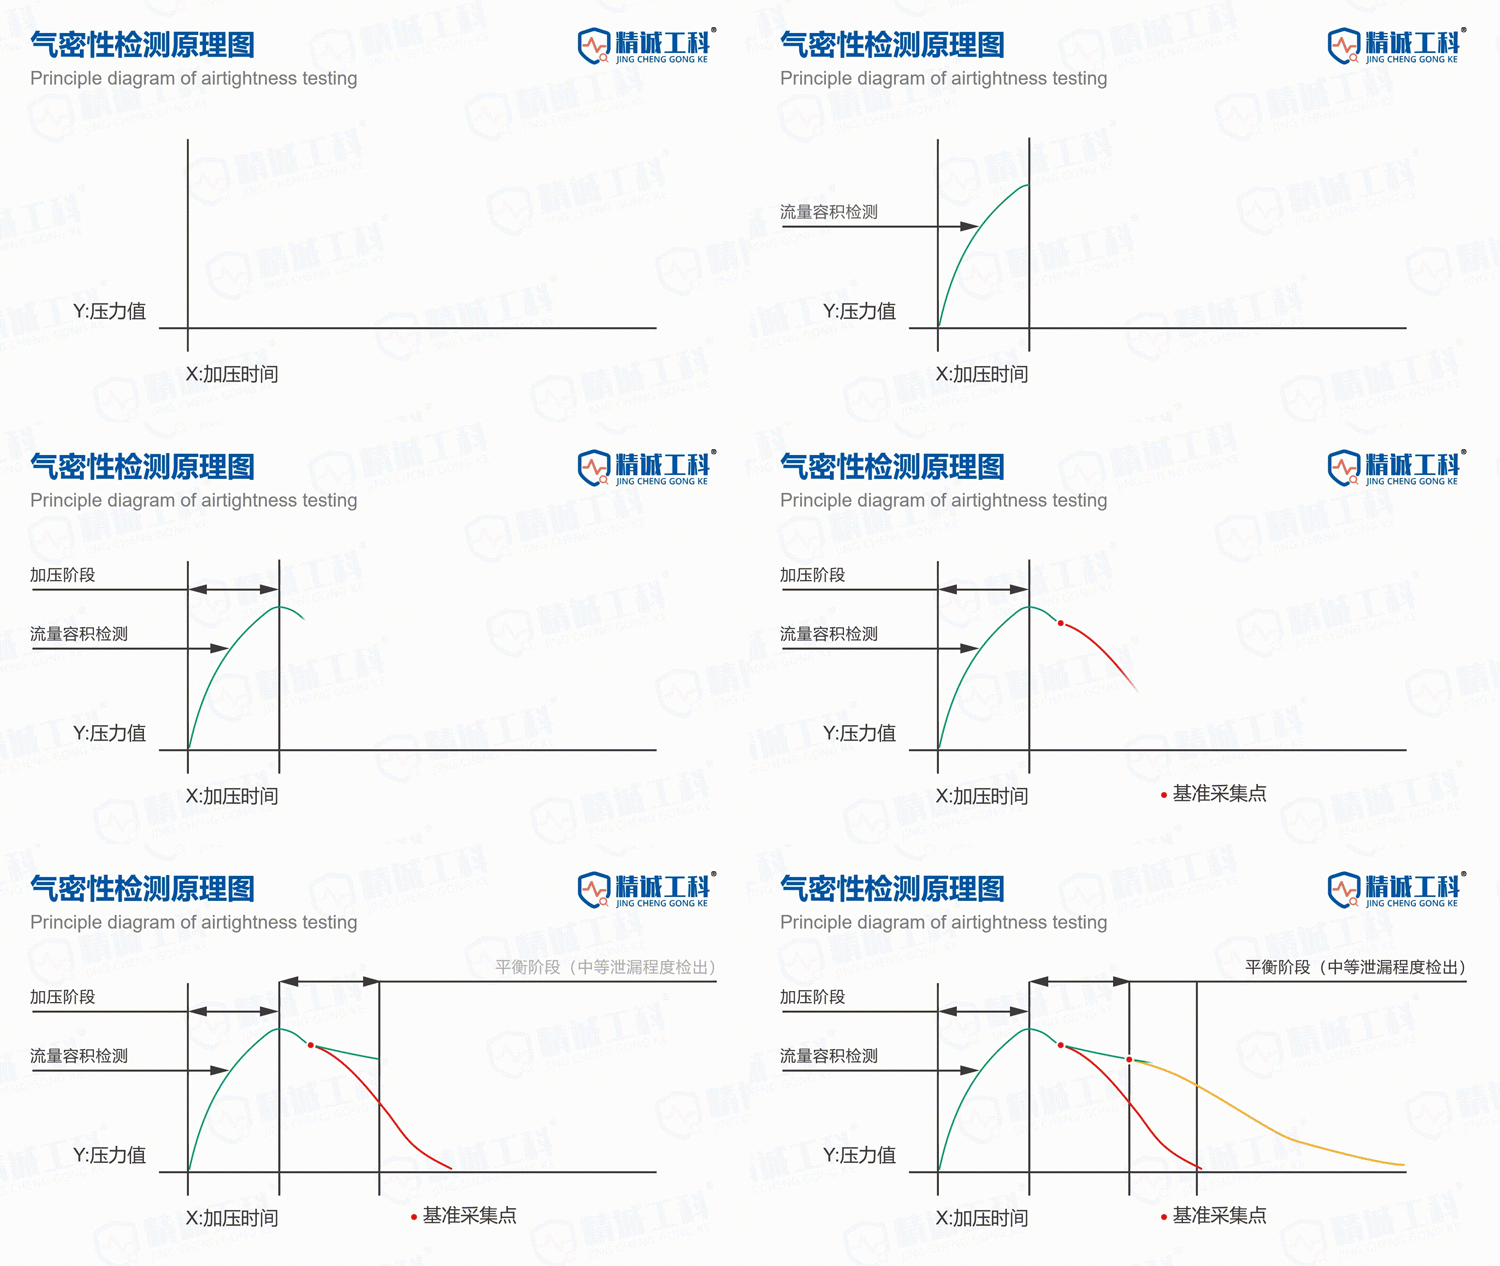
The negative pressure method is the opposite, where we pull air out of the product under test so that the internal pressure is lower than atmospheric pressure.If there is a leak, outside air will flow into the DUT. Although the direction of gas flow is opposite to the positive pressure, this 'inflow' is still considered to be a leak and is still expressed as a positive value.
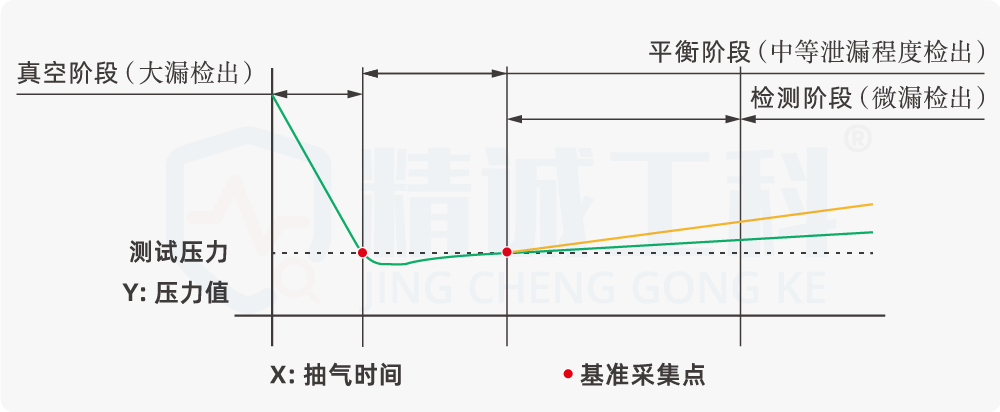
Second, why is the negative pressure test result a positive value
I remember one time a young engineer was confused by the positive leakage values he saw during a negative pressure test. I then gave him an analogy:Imagine you're vacuuming your carpet and the vacuum cleaner is generating negative pressure, but the amount of dust going into the vacuum cleaner, we still say 'how much dust was breathed in' and not 'the amount of negative dust'.
Video example: LED luminaire negative pressure airtightness test, positive leakage results
It is critical to understand that positive or negative leakage does not indicate the direction of gas flow, but rather how much leakage is present. It is the absolute amount of leakage that we are concerned with, whether it is a positive or negative pressure test.It is normal and consistent with industry practice for leakage to show positive values for both positive and negative pressure tests.It is important to properly understand the meaning of this value and to determine if this leakage is within acceptable limits based on the specific requirements of the product. It also reminds us that when interpreting instrument data, it is important to incorporate specific test methods and principles. Do not be confused by the surface of the number of eyes, to understand the meaning behind it.
III. Reasons for negative values
We've just said that positive and negative pressure leaks usually show positive values, but there are some special cases that do exist thatThe test results of the airtightness tester may show negative values.
This is not common but it does happen, especiallyWhere a differential pressure airtightness tester is used.Let's take a look at the reasons behind this and the corresponding solutions.
Video Case: Differential Pressure Airtightness Testing of Automotive Components, Leakage; Negative Measurement Results
In my years of experience, I have found the following to be the main causes of negative values:
- a) Leakage of the standard part, the standard part is used to compare the pressure with the inspected part during the differential pressure test to analyze whether there is leakage or not, if the standard part is leaking, the pressure of the inspected part is greater than that of the standard part, and then the instrument will show a negative leakage result.
- b) Standard parts are subjected to external environmental factors different from those of the part under test, such as temperature, humidity, etc., resulting in a drop in pressure and thus a negative leakage display.
- c) Large structural or volumetric differences between the standard part and the part under test, which cause the pressure change characteristics of the part under test to be inconsistent with that of the standard part, resulting in a negative display or an abnormal leakage value display.
IV. Negative leakage value solutions
So what do you do when you run into a negative value? First of all, don't be anxious. We have some practical solutions to face these problems:
a) Leakage problems with standardized parts
- The standards can be tested individually to rule out their own problems. If the standard behaves normally, you can continue to the next step.
- If there is a problem with the standard, it needs to be replaced with a new standard for testing.
b) Standardized parts are subject to different external environmental factors than tested parts
- Control the environmental conditions of the standard parts and test parts in the testing process. For example, keep both at the same temperature for testing to minimize the effect of external temperature differences.
- Multiple tests can also be averaged to minimize random errors.
c) Excessive structural or volumetric differences between the standardized parts and the tested parts.
- Check the consistency of the standardized parts with the tested parts in terms of physical structure, etc.. For example, whether the unit size is the same, whether the complexity of the structure is balanced, etc.
Summarize
In the world of engineering, anomalous data is often the source of new discoveries. When you encounter a negative value, think of it as an opportunity to gain insight into the product and the testing process. Airtightness testing, although seemingly simple, involves knowledge of physics, materials, instrumentation, and many other aspects.It's these details that make our work challenging and fun.
I hope this article will help you better understand airtightness testing.If you have any further questions, please feel free to ask us.
To learn more detailed industry testing programs and application cases, please pay attention to [Jingcheng Engineering Airtightness
